
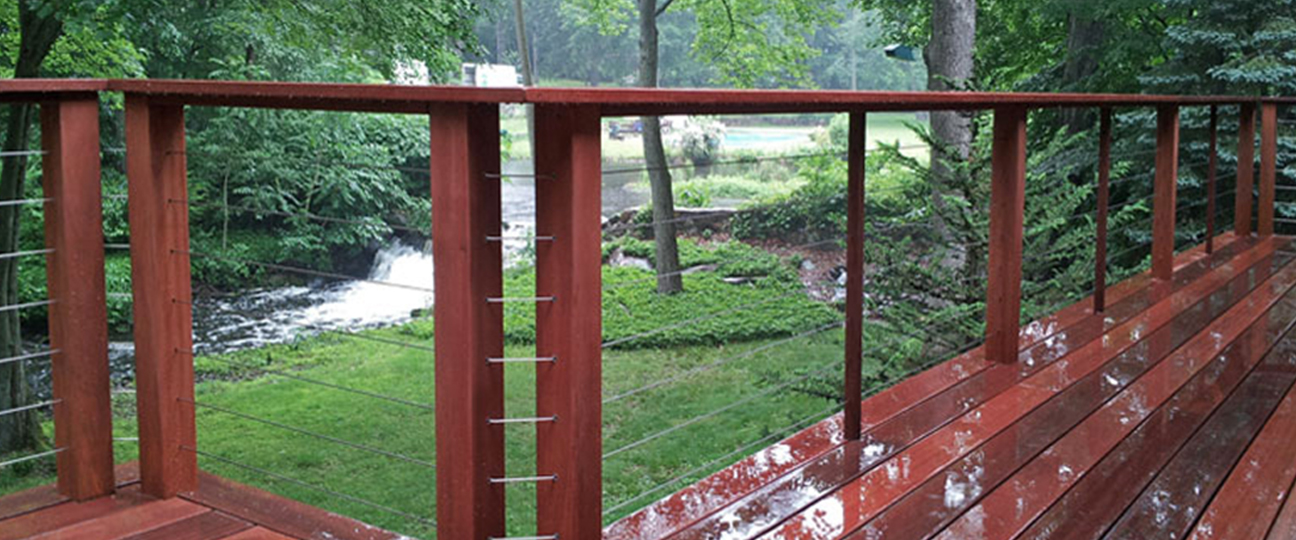
Feeney CableRail can turn an ordinary deck into a statement-making space that enhances the view. Following are some things to keep in mind when incorporating cable rail in an exterior setting.
Design
For cable railing to maintain proper tension, it must be stretched somewhat during installation. That’s because each cable can exert a lateral load on the posts of up to three hundred pounds – a significant force. As such, it’s very important to have a rigid top rail running between the posts. Running a bottom rail between the posts is also a good idea. However, a good post attachment can work equally well.

- Pay attention to post location. Depending on the type of cable termination being used, end posts should be located no more than 3½ inch from the building to ensure there is adequate working space to tighten the cables (typical building code allows no more than a 4” gap at any location where railing is required).
- Importance of post spacing. Feeney recommends a maximum free span of no greater than 36-inches. In general, this recommendation is satisfied by using a maximum post spacing of six feet with midspan supports – such as Feeney’s Stainless Steel Intermediate Pickets.
- Be mindful of corners. Corners can be addressed in a couple of ways. The most common solution is to install two corner posts. This enables the cables to be terminated on the outside of each post, or – using sleeves to protect the holes in the posts – to run through the posts continuously. Feeney’s CableRail Tensioning Tool provides a convenient way to ensure that the cables are properly tensioned.If opting to use a single post, the cables on one side of the post will need to terminate with a face-mounted connector rather than running through the post.
- Space cable properly. According to building code, railing assembly components must be spaced so that a four-inch sphere is unable to pass between them. Since cable will deflect, the spacing between cables should be kept to a maximum of three inches.
Materials
While cable railing is sold in several diameters, 1/8-inch is the most popular option. The majority of cable and fittings installed are marine-grade 316 stainless steel, which is recognized for its strong corrosion resistance.
A variety of fastening systems are available for cable railing. Every cable run includes an anchor along with a method of tensioning. While these fasteners are responsible for securing the cable, they also need to appear attractive and maintain the streamlined aesthetic for which cable rail is known. Functionally, the cable must be attached to the hardware in a manner that enables it to resist significant tension. Feeney’s patented Quick-Connect® fittings simplify fastening, using one-way gripping technology without the need for special tools.
In some cable railing systems, the cable comes in spools that is trimmed to the desired length on the job site, which typically necessitates swaging the hardware onto one end. Feeney CableRail kits come with pre-cut cable in five-foot increments, and with a Threaded Terminal installed on one end
In addition to Feeney CableRail kits, a wide array of additional fittings are available, including fittings that are attached to the face of posts, pivoting fittings for stairs, and fittings that anchor cables to masonry walls.
Installation
Cables should be spaced at a maximum of 3 inches on center. The top cable can be up to 3-1/2” from the top rail, and the bottom cable up to 3-1/2” from the bottom rail or deck.
While the posts and intermediate pickets can be drilled after installation, most installers prefer to instead use a drill press to drill the posts on level areas prior to installation. This allows the installer to confirm that all holes are centered on both sides of the post, and that they are drilled squarely.
It’s crucial that any holes drilled in posts along stairs match the stair angle. Marking the layout on each side of these posts, and then drilling partway through from each side will help to ensure that the visible holes are consistent, even in cases where the drill angle is slightly off.
To begin installation of the cables, the Threaded Terminal fitting is inserted through one of the end posts. A Snug-Grip® washer nut is screwed onto the Threaded Terminal on the outside face of the post. Then the free end of the cable is laced through the posts, and the Quick-Connect® fitting is placed on the cable on the outside face of the termination post. The cable is pulled through the Quick-Connect® Inset fitting to create the initial tension - this can be done with the aid of Feeney’s CableRail Tensioning Tool.
Final tensioning should always start with the middle cable; the additional cables are tensioned by moving up or down in an alternating pattern. Tensioning is achieved by tightening the Snug-Grip® washer nut on the Threaded Terminal. A tension gauge is recommended to verify the proper tension. The extra cable is then trimmed at the Quick-Connect Inset fitting, extra threads are trimmed off at the Threaded Terminal fitting, and end caps are applied, which hides the cut ends for a clean look. Feeney’s end caps snap on easily and are available in a wide range of shapes and colors.


Original post from http://media.feeneyinc.com/blog/cablerail-makes-it-easy-to-savor-the-view